Getting started
Install the app, create your first option set, turn on the app embed and check it on a product page.
Quick answer
Install A Gen Product Options from the Shopify App Store, create an option set under Option sets, set it to Active and choose which products it applies to. Then switch on the A Gen Product Options app embed in your theme editor and save. Options appear on those product pages, and the Home checklist tracks each step.
Last updated
Setup takes three steps, and the app's Home page walks you through them with a checklist. This page follows the same order.
1. Install the app
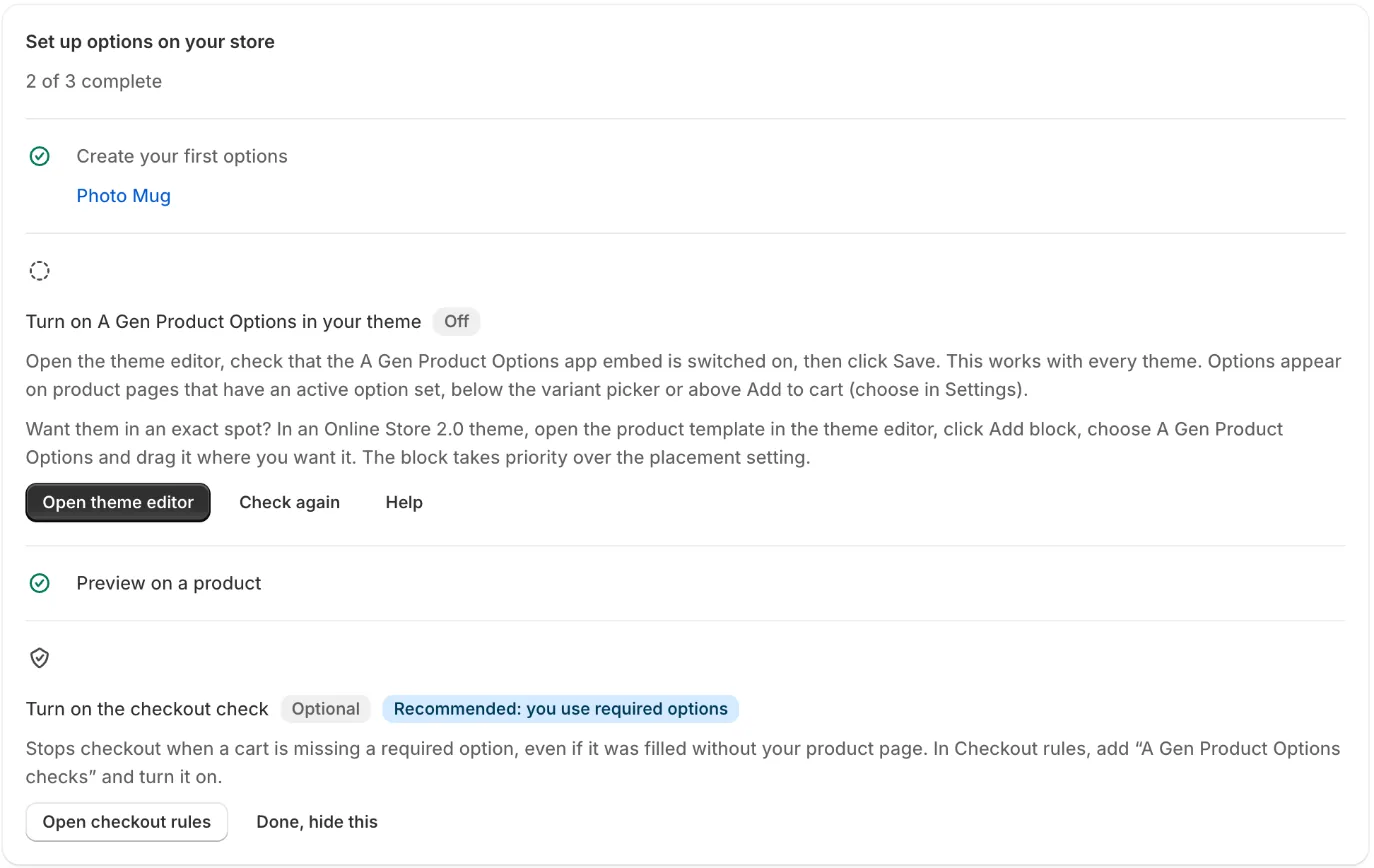
Install A Gen Product Options from the Shopify App Store. It opens on Home, with a setup checklist under Set up options on your store. The app menu has Home, Option sets, Product options and Settings.
2. Create your first options
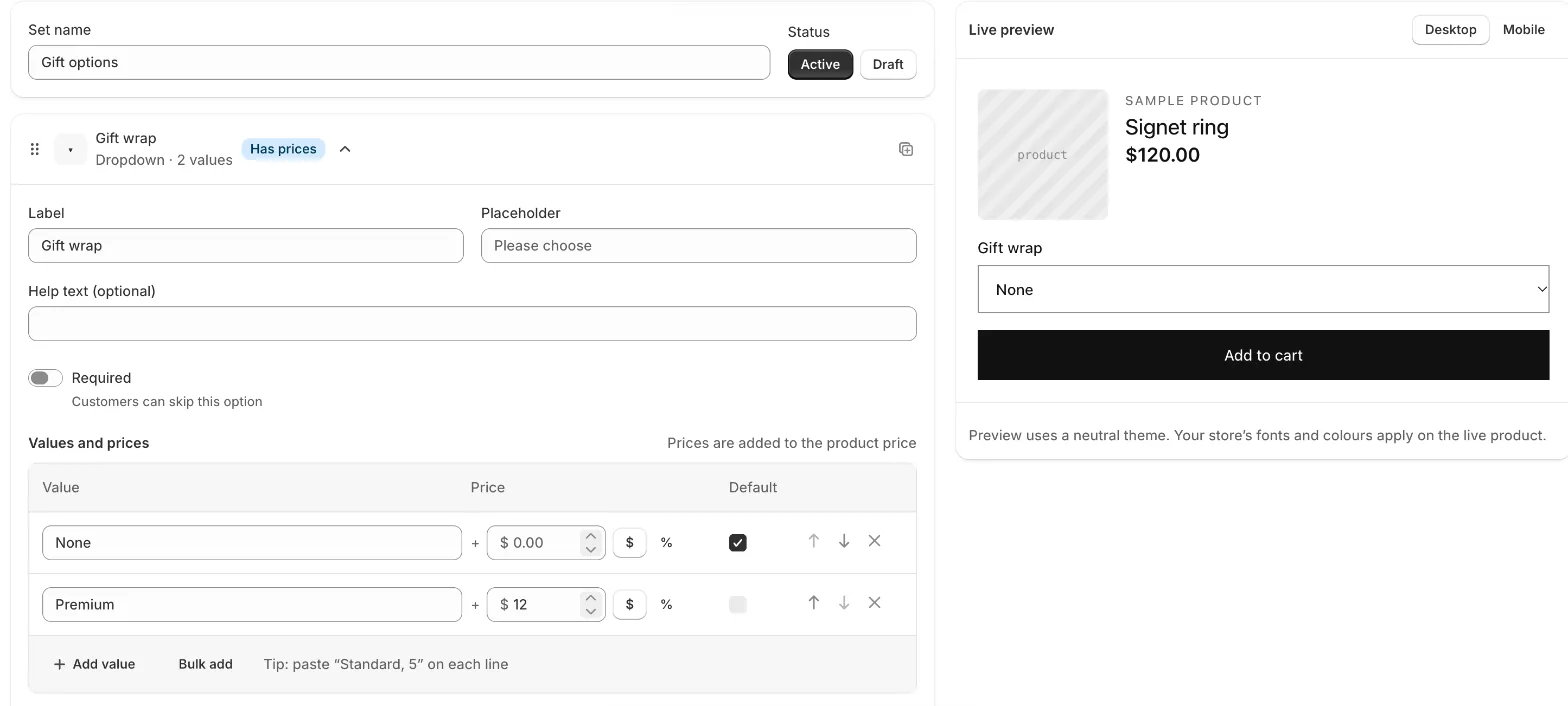
Use an option set for many products, or product options for just one. For a first try, an option set is quickest:
- On Home or on Option sets, click Create option set.
- Give it a Set name, for example “Ring engraving”, and click Create and add options.
- Click Add option and pick a type, or click one of the Popular types. Fill in a Label, add values, and put a price on any value that costs extra.
- Set Status to Active.
- Open Applies to and choose where the set shows under Show this option set on: All products, Specific products, Collections or Product tags.
- Click Save.
Tip
The preview beside the editor shows the options as shoppers will see them while you build.
3. Turn on A Gen Product Options in your theme
- On Home, click Open theme editor. It opens your theme with the app embed selected.
- Check that the A Gen Product Options app embed is switched on, then click Save.
- Back on Home, click Check again. The step shows Theme embed on when it's done.
This works with every theme. Options appear on product pages that have an active option set, below the variant picker or above Add to cart. You choose which in Settings. To place them in an exact spot instead, use the app block: see Storefront display.
4. Check a product page
Use View product under Preview on a product on Home, or open any product the set applies to. Pick a priced value: the price shows next to the value, and the product price updates with a note such as “Includes $12.00 in options”. Add it to the cart and go to checkout: the line costs the product price plus the options and lists each choice.
Optional: turn on the checkout check
If you use required options, Home recommends turning on the A Gen Product Options checks rule. It stops checkout when a required option was skipped. See Cart, checkout and orders.
Stuck on something?
Check Troubleshooting, or email us with your store URL and we’ll help.
Email support