Quick answer
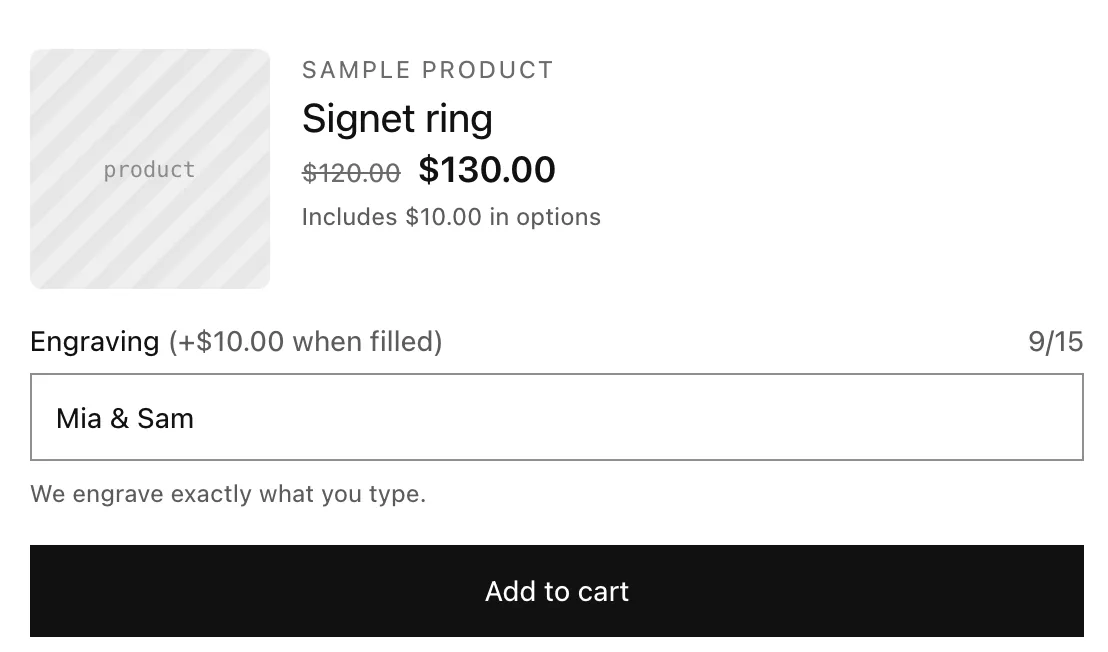
Add a Single-line text option labeled Engraving, set Price when filled in to 10 and Max characters to 15, and leave Required off. Shoppers who type a name pay $10.00 more, and the field stops at 15 characters. Optionally add a Font picker for the lettering that shows only when the engraving is filled in.
Last updated
You'll add an Engraving field to a product. It's free to leave empty, costs $10 when the shopper types something, and can't go over 15 characters. Optionally, the shopper picks a lettering style.
What you’ll build
Step 1: Create the option set
- Go to Option sets and click Create option set.
- Name it “Ring engraving” and click Create and add options.
Step 2: Add the engraving field
- Click Add option and choose Single-line text.
- Label: “Engraving”. Placeholder: “Up to 15 characters”.
- Help text (optional): “We engrave exactly what you type.”
- Price when filled in: 10.
- Max characters: 15.
Leave Required off so engraving stays optional. The price shows next to the label as “(+$10.00 when filled)”; you can reword “when filled” under Storefront text in Settings.
Step 3: Optional: let shoppers pick a lettering style
- Click Add option and choose Font picker. Label: “Lettering”.
- Under Fonts to offer, tick your theme's heading or body font, or search the Google Fonts library.
- Mark the font you want pre-selected as Default. Defaults are only pre-selected when they're free.
To show Lettering only when there's engraving, open its Conditions, click Add rule and choose When “Engraving” is Filled in.
Step 4: Apply it and save
- Set Status to Active.
- On Applies to, choose Specific products and pick your engravable products, or use Product tags such as “engravable”.
- Click Save.